Hey there, fashion - savvy peeps! If you're into all things hair and looking to up your bun game with a lace closure, you've come to the right place. I'm a lace closure supplier, and I've seen it all when it comes to styling these bad boys into awesome buns. So, let's dive right in and learn how to style a lace closure in a bun.
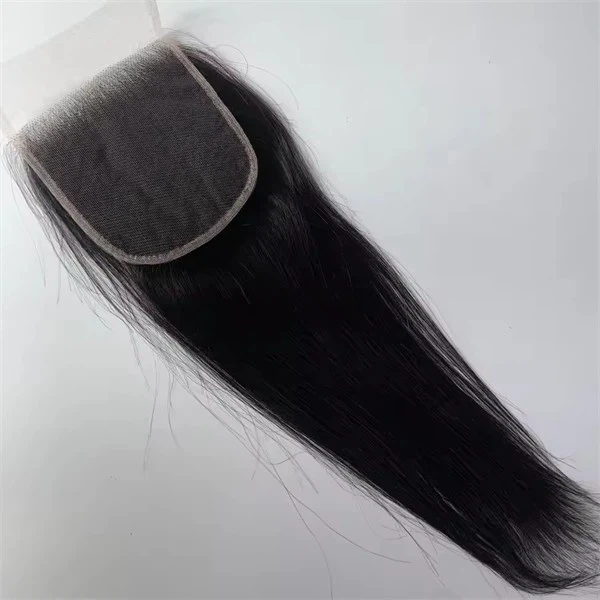
First off, let's talk about the different types of lace closures you can use. We've got the 5x5 Lace Closure, the 4x4 Lace Closure, and the 6x6 Lace Closure. Each one has its own unique features and benefits. The 4x4 is a bit smaller, which can be great for a more petite or subtle look. The 5x5 is a popular choice as it gives you a good amount of coverage and flexibility. And the 6x6? Well, it's the big daddy of them all, offering maximum coverage and a more voluminous appearance.
Before you start styling, you need to prep your lace closure. First, wash it with a good quality shampoo and conditioner. This helps to get rid of any dirt, oil, or chemicals that might be on the lace or the hair. I recommend using products that are specifically designed for synthetic or human hair lace closures, depending on what type you have. After washing, gently detangle the hair using a wide - tooth comb. Start from the ends and work your way up to the roots to avoid any breakage.
Once your lace closure is clean and detangled, it's time to install it. This is a crucial step as a proper installation will make your bun look flawless. You can use glue, tape, or clips to secure the lace closure to your scalp. If you're using glue, make sure to clean your scalp first to ensure a good bond. Apply the glue along the perimeter of the lace closure and carefully place it on your head, pressing it down firmly. If you prefer tape, cut the tape to the right size and stick it to the lace and then to your scalp. Clips are a more temporary option, but they're great if you want to change up your style frequently.
Now, let's get to the fun part - styling the bun. There are so many different ways to do it, but I'll start with the classic high bun. First, gather all the hair from the lace closure and pull it up to the top of your head. Use a hair tie to secure it into a ponytail. Make sure the ponytail is tight enough so that the hair doesn't fall out, but not so tight that it gives you a headache.
Next, take a small section of hair from the ponytail and wrap it around the base of the ponytail to cover the hair tie. You can use a bobby pin to secure the end of the wrapped hair. Then, start twisting the remaining hair in the ponytail. As you twist, start wrapping it around the base of the ponytail in a circular motion to form a bun. Keep wrapping until you've used up all the hair, and then secure the end of the hair with more bobby pins.
If you want a more textured look, you can add some curls to the hair before making the bun. You can use a curling iron or hot rollers to create curls. After curling, run your fingers through the curls to loosen them up a bit. Then, gather the curled hair into a ponytail and follow the same steps as above to make the bun. The curls will give your bun a more voluminous and glamorous appearance.
Another cool style is the low bun. Instead of pulling the hair up to the top of your head, gather it at the nape of your neck. Secure it into a ponytail with a hair tie. Then, just like with the high bun, take a small section of hair to cover the hair tie and start twisting and wrapping the remaining hair to form the bun. A low bun is a more elegant and sophisticated look, perfect for a formal event or a day at the office.
You can also accessorize your bun to make it even more stylish. You can add a hairpin with a beautiful gemstone, a silk scarf around the base of the bun, or even some fake flowers. These little touches can really take your bun from ordinary to extraordinary.
For those of you who like a more edgy look, you can try a messy bun. Instead of making a tight, perfect bun, let some of the hair fall out around the edges. Pull the hair into a ponytail, but don't make it too tight. Then, start wrapping the hair around the base of the ponytail in a more haphazard way. Don't worry about making it look perfect - that's the whole point of a messy bun. Use bobby pins to secure the hair in place, but leave some strands loose for that effortless look.
Maintenance is also important if you want your lace closure bun to last. Avoid sleeping with your bun down as it can cause the hair to get tangled and the lace to loosen. Instead, tie a satin or silk scarf around your head before going to bed. This helps to keep the hair in place and also reduces friction, which can prevent breakage.
When it comes to washing your lace closure bun, don't do it too often. Over - washing can damage the hair and the lace. Aim to wash it every 1 - 2 weeks, depending on how dirty it gets. And always use a gentle touch when washing and detangling.
Now, if you're thinking about getting a lace closure for your bun - styling adventures, I'm here to help. As a lace closure supplier, I've got a wide range of high - quality lace closures in different sizes, colors, and textures. Whether you're looking for a natural - looking human hair lace closure or a synthetic one that's more affordable, I've got you covered.
If you're interested in purchasing a lace closure, feel free to reach out. We can have a chat about your specific needs, such as the size, color, and style you're looking for. I can also provide you with more information about the products, like the quality of the lace and the hair. So, don't hesitate to get in touch and let's start creating some amazing bun looks together!
References

- "Hair Styling 101: The Ultimate Guide to Buns" - A collection of various hair styling tips and tricks.
- "Lace Closure Care and Maintenance" - A guide on how to take care of your lace closure to ensure its longevity.